top of page

Hip flexor stretches play a crucial role in maintaining mobility, improving posture, and preventing injuries. In today's fast-paced world, many of us are often confined to our desks or sedentary lifestyles, leading to tight hip flexors. Whether you're a beginner or an advanced practitioner, incorporating hip flexor stretches into your routine can unlock a world of freedom in movement. This post will explore simple stretches for beginners, advanced techniques for experienced individuals, and everything in between.


Why Focus on Hip Flexors?


The hip flexors are a group of muscles that help lift your knees and bend at the waist. They are essential for activities like walking, running, and sitting. When tight, they can lead to discomfort in the lower back and hips.


Understanding the importance of these muscles can motivate you to incorporate effective stretching into your daily routine, helping you achieve better mobility and comfort in your everyday life.


Basic Hip Flexor Stretches for Beginners


Starting with basic stretches allows you to build a foundation for better mobility. Here are a few effective stretches that are perfect for beginners:


1. Standing Hip Flexor Stretch


Instructions:


  1. Stand tall with your feet hip-width apart.

  2. Step one foot back, keeping the opposite knee bent.

  3. Ensure that your back leg is straight and your pelvis is tucked under.

  4. Hold for 15-30 seconds and switch sides.


This stretch helps to lengthen the hip flexors while also engaging the stabilizing muscles of your legs.


2. Lunge Stretch


Instructions:


  1. Begin in a standing position and step forward with one foot into a lunge.

  2. Lower your back knee to the ground, keeping your front knee aligned over your ankle.

  3. Hold the position for 20-30 seconds, feeling the stretch in the hip flexor of the back leg.

  4. Switch legs and repeat.


This not only stretches the hip flexors but also strengthens the glutes and quads.


3. Seated Butterfly Stretch


Instructions:


  1. Sit on the floor and bring the soles of your feet together.

  2. Let your knees fall out to the sides.

  3. Hold your feet with your hands and gently press your knees toward the ground.

  4. Hold for 20-30 seconds.


This stretch opens up the hips and helps to improve flexibility in the inner thighs.


Eye-level view of a yoga mat on a hardwood floor ready for stretches
Yoga mat preparation for hip flexor stretches

Intermediate Hip Flexor Stretches


Once you've mastered the basics, you can progress to intermediate stretches that further challenge your hip flexors.
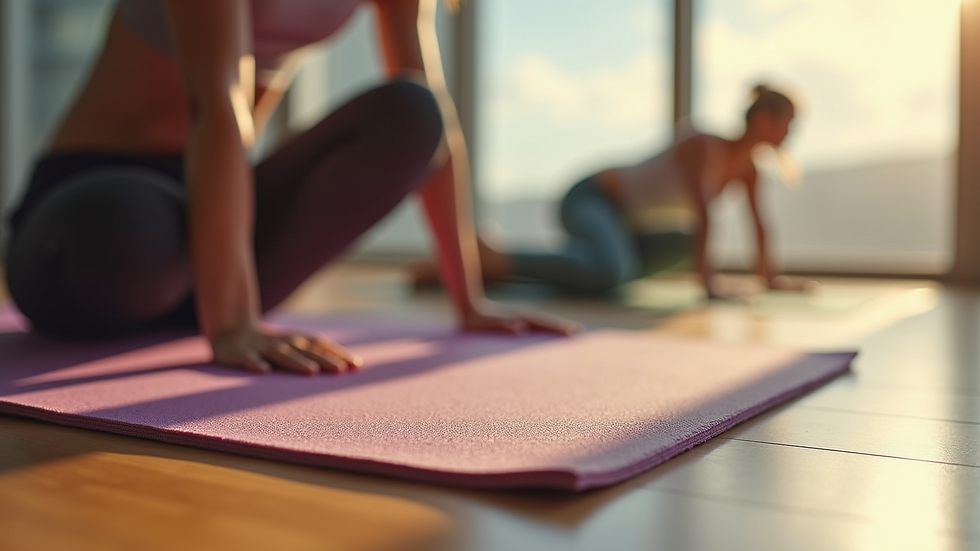

1. Pigeon Pose


Instructions:


  1. Start in a tabletop position on the floor.

  2. Bring your right knee toward your right wrist, and extend your left leg straight back.

  3. Lower your torso down towards the ground, feeling the stretch in your hip.

  4. Hold for up to 30 seconds, then switch sides.


Pigeon pose deeply opens the hips and improves flexibility.


2. Couch Stretch


Instructions:


  1. Position your back knee on the ground and place your foot against a wall or couch.

  2. Move your front foot forward into a lunge position.

  3. Keep your back straight and push your hips forward for a deeper stretch.

  4. Hold for 30 seconds, then switch legs.


This stretch targets hip flexors and quadriceps intensely.


3. Lizard Pose


Instructions:


  1. Start in a high plank position.

  2. Step your right foot outside your right hand and lower your hips.

  3. Keep your back leg straight and shift weight forward for a deeper stretch.

  4. Hold for 30 seconds and switch sides.


Lizard pose is excellent for increasing hip flexibility.


Close-up view of a vibrant plant in a serene yoga space
Natural elements in a dedicated yoga area for stretch practice

Advanced Hip Flexor Stretches


For seasoned individuals looking to push their limits, these advanced stretches can enhance mobility and flexibility even further.


1. Advanced Pigeon with Twist


Instructions:


  1. Start in the basic pigeon position.

  2. Instead of resting your torso low, twist your torso towards your forward leg, reaching your opposite arm over your head.

  3. Hold for 30 seconds and switch sides.


This variation enhances the stretch and adds a twist that engages the core.


2. Deep Lunge with a Reach


Instructions:


  1. Begin in a lunge position, knee off the ground.

  2. Lift your back arm and reach upward, while the front arm reaches toward the ground.

  3. This twists your spine while stretching the hip flexor.

  4. Hold for 30 seconds and repeat on the other side.


This dynamic stretch engages multiple muscle groups while targeting the hip flexors.


3. Fire Hydrant Stretch


Instructions:


  1. Begin in a tabletop position.

  2. Lift one knee out to the side while keeping your hip stable.

  3. Move your leg in a circular motion, feeling the stretch in your hip flexors and glutes.

  4. Complete 10 circles in each direction and switch legs.


This stretch also targets the glutes and lateral hip muscles.


Conclusion


Whether you’re just starting your mobility journey or you’re an experienced practitioner, developing a routine of hip flexor stretches can significantly enhance your physical comfort and performance. Beginners can ease into the practice with fundamental stretches, while experts can explore more advanced variations to maximize their results.


Regularly incorporating these movements into your exercise regimen can help combat tightness, enhance flexibility, and ultimately lead to a more active and pain-free life.


Make time for these essential stretches, and unlock your body’s true potential!


High angle view of tranquil yoga space filled with sunlight
Serene environment for practicing hip flexor stretches


Low back pain is a common condition that affects millions of individuals worldwide. It can arise from various factors, including poor posture, muscle imbalances, and lack of core strength. While there are numerous treatment options available, trunk coordination techniques have emerged as a highly effective method for promoting recovery and alleviating pain. This blog post explores the benefits of these techniques for low back pain patients and offers insights into how to integrate them into your daily routine.


Understanding Trunk Coordination Techniques


Trunk coordination techniques focus on enhancing the stability and movement of the trunk and pelvis during various activities. This approach aims to improve the interplay between the core, hip, and back muscles, which are essential for maintaining proper posture and performing movements safely. By fostering better coordination among these muscle groups, patients can experience a significant reduction in low back pain.


Trunk coordination techniques include specific exercises designed to engage the core effectively. These may incorporate elements of Pilates, physical therapy, and sports rehabilitation programs. Beyond mere strength training, these techniques emphasize the functionality of movement, ensuring that the body's various parts work together harmoniously.


The Importance of Core Stability


Core stability forms the foundation for numerous movements we perform daily. Weakness or dysfunction in the core can lead to compensatory patterns that strain the lower back, resulting in discomfort or injury. Trunk coordination techniques help to build the muscles surrounding the spine, which provide support and stability.


An optimal core allows for better transfer of forces throughout the body, reducing the risk of injuries during activities such as bending, lifting, or twisting. Additionally, a stable core contributes to improved balance and posture, minimizing the risk of developing chronic low back pain due to muscle fatigue or overuse.


Benefits of Trunk Coordination Techniques for Low Back Pain Relief


1. Improved Muscle Activation


One of the primary advantages of trunk coordination techniques is enhanced muscle activation. These exercises promote awareness of proper muscle engagement, allowing patients to target the specific muscles needed to support the back effectively. This improvement in muscle activation helps correct imbalances and compensatory patterns that often lead to pain.


2. Enhanced Flexibility


Flexibility plays a significant role in preventing injuries and reducing discomfort. Trunk coordination techniques often involve dynamic stretching and controlled movements that improve flexibility in the lumbar region and surrounding areas. Increased flexibility allows for greater range of motion and can ease tension in the muscles around the spine.


Eye-level view of a person performing trunk coordination exercises
Individual practicing trunk coordination exercises for low back pain relief.

3. Pain Reduction


Many patients experience a reduction in pain levels after incorporating trunk coordination techniques into their rehabilitation programs. These methods address the root causes of pain by promoting better alignment and function of the spine. As patients gain strength and control over their movements, they may find that their pain diminishes significantly.


4. Functional Strength


Trunk coordination techniques enhance functional strength, making everyday activities easier and less painful. By training the body to move more efficiently, patients can perform tasks such as lifting, bending, and twisting with greater ease and less discomfort. This functional strength contributes to improved overall quality of life.


5. Mind-Body Connection


Trunk coordination techniques encourage a strong mind-body connection, which is crucial for rehabilitation. By focusing on the quality of movement and awareness of bodily sensations, patients can develop a deeper understanding of their physical limitations. This heightened awareness can empower individuals to make informed choices in their daily activities, reducing the risk of reinjury.


How to Incorporate Trunk Coordination Techniques into Your Routine


Incorporating trunk coordination techniques into a daily routine can lead to remarkable improvements in low back pain symptoms. Below are some practical steps to follow:


1. Start with Assessment


Before beginning any exercise program, it’s essential to assess your current level of fitness and flexibility. Consider consulting with a physical therapist or healthcare professional who can guide you in identifying specific areas of weakness or imbalance.


2. Focus on Core Exercises


Incorporate exercises specifically designed to strengthen the core and improve trunk coordination. Some effective exercises include:


  • Bridges: Laying on your back with knees bent, lift your hips while engaging your core. Hold for a few seconds before lowering.


  • Planks: Holding a plank position engages the entire core. Aim to maintain proper form to maximize effectiveness.


  • Bird-Dogs: Begin on all fours and extend one arm and the opposite leg. Hold the position to improve balance and coordination.


3. Combine Techniques with Breathing


Integrate breathing techniques with your exercises. Deep, diaphragmatic breathing can enhance core engagement and relaxation during movements.


4. Gradually Increase Difficulty


As stability and strength improve, progressively increase the difficulty of the exercises. This could mean extending the time spent holding a plank or adding resistance bands for extra challenge.


5. Stay Consistent


For the best results, consistency is crucial. Aim to incorporate trunk coordination exercises into your routine at least three times a week and ensure that you continuously challenge yourself to improve.


Wide angle view of a serene fitness studio with exercise mats
Calm fitness studio environment perfect for practicing trunk coordination techniques.

Success Stories from Patients


Many patients who have embraced trunk coordination techniques have shared their positive experiences regarding low back pain relief. These stories highlight the transformative power of integrating strategic movement patterns into daily life.


Individuals report feeling stronger, more agile, and more confident in performing physical activities they once avoided due to pain. As they progress, these patients often find themselves participating in social and recreational activities that they previously had to abandon.


Seeking Professional Guidance


Although trunk coordination techniques can be practiced at home, enlisting the help of a qualified professional can be beneficial. Physical therapists and qualified personal trainers who specialize in rehabilitation can provide personalized programs tailored to individual needs and limitations.


In addition, they can ensure patients are using proper techniques to avoid further injury. Their expertise ensures a safe approach to recovery while enabling patients to achieve optimal results.


Conclusion


Trunk coordination techniques represent a powerful approach to managing low back pain effectively. By focusing on improving core stability, muscle activation, and flexibility, patients can experience significant pain relief and enhanced quality of life.


Incorporating these techniques into daily routines leads to functional strength and a deeper understanding of one’s body, empowering individuals to reclaim their lives from the grip of pain.


If you're struggling with low back pain, consider integrating trunk coordination techniques into your rehabilitation journey. Remember, the road to recovery may be challenging, but with dedication, support, and the right strategies, relief is within reach.


High angle view of an inviting exercise space highlighting fitness equipment
Inviting exercise area equipped for trunk coordination practice and rehabilitation.


Sciatica is a painful condition that affects many seniors, causing discomfort that can significantly impact daily life. It typically arises from irritation of the sciatic nerve, often due to issues in the lower back, such as herniated discs or spinal stenosis. While professional medical guidance is essential, incorporating appropriate exercises into a management strategy can help alleviate symptoms and improve mobility. This post explores effective exercise management strategies specifically tailored for older adults suffering from sciatica.


Understanding Sciatica


Sciatica manifests as pain radiating along the path of the sciatic nerve, usually affecting one side of the body. Seniors may experience varying levels of discomfort ranging from mild to severe, often accompanied by numbness, tingling, or weakness in the leg. Understanding the nature of sciatica is crucial for developing an effective exercise regimen.


As people age, changes in the spine, such as degenerative disc disease or arthritis, can contribute to the onset of sciatica. Recognizing the importance of personalized exercise management can empower seniors to take control of their symptoms and enhance their quality of life.


Key Exercise Principles for Seniors


When devising an exercise plan for seniors with sciatica, several key principles should be considered:


1. Safety First


Safety is paramount, especially for older adults. Before starting any exercise program, seniors should consult with their healthcare provider or a physical therapist. This ensures that the chosen exercises are appropriate for their individual health status and physical capabilities.


2. Focus on Low-Impact Activities


Low-impact exercises are less likely to exacerbate sciatica symptoms. These activities, including swimming, cycling, and walking, can help maintain mobility without putting undue strain on the spine.


Eye-level view of a quiet park pathway suitable for walking
A serene park pathway perfect for seniors to enjoy low-impact walking.

3. Incorporate Stretching and Flexibility


Gentle stretching and flexibility exercises help relieve tension in the muscles supporting the spine. Such exercises can alleviate pressure on the sciatic nerve and ease discomfort. Specific stretches targeting the hamstrings, piriformis, and lower back can be particularly beneficial.


Recommended Exercises for Seniors with Sciatica


Here are several recommended exercises that are suitable for seniors managing sciatica:


1. Hamstring Stretch


This exercise helps to loosen the hamstrings, which may become tight and contribute to sciatica pain.


  • How to do it: Sit on the edge of a chair with one leg extended straight out. Keep the other foot flat on the floor. Lean forward gently over the extended leg while keeping your back straight. Hold for 15-30 seconds, then switch legs.


2. Piriformis Stretch


The piriformis muscle can irritate the sciatic nerve when tight. Stretching it can relieve pressure.


  • How to do it: Lie on your back with both knees bent. Cross one ankle over the opposite knee. Gently pull the uncrossed knee towards your chest until you feel a stretch in the buttock area. Hold for 15-30 seconds, then switch sides.


Close-up view of a yoga mat laid out for stretching exercises
A yoga mat laid out on a wooden floor for practicing stretching exercises.

3. Cat-Cow Stretch


This gentle stretch promotes spine flexibility and eases tension.


  • How to do it: Start on all fours with hands aligned under shoulders and knees under hips. Inhale while arching your back (cow position), then exhale while rounding your back (cat position). Repeat this motion 5-10 times, focusing on your breath.


4. Seated Knee to Chest Stretch


This exercise can help alleviate lower back tension.


  • How to do it: Sit in a chair with your feet flat on the ground. Slowly pull one knee toward your chest while keeping your other foot planted. Hold for 15-30 seconds and then switch legs.


5. Walking


Walking is one of the best low-impact exercises for seniors. Just 20–30 minutes a day can improve circulation and strengthen the muscles that support the spine.


Additional Tips for Exercise Management


Beyond specific exercises, consider the following tips to enhance exercise management for seniors with sciatica:


1. Maintain Consistency


Regular exercise is key to managing sciatica effectively. Aim for at least 150 minutes of moderate activity per week, broken down into manageable sessions.


2. Listen to Your Body


Seniors should pay attention to their bodies and avoid pushing through pain. If any exercise exacerbates symptoms, it may be necessary to adjust the routine or seek guidance from a healthcare professional.


3. Incorporate Strength Training


In addition to flexibility and low-impact cardio, incorporating light strength training can enhance muscle support around the spine, helping mitigate sciatica symptoms. Resistance bands or light weights can be effective tools.


4. Focus on Proper Posture


Practicing good posture during exercises and daily activities can reduce strain on the back. Encourage seniors to maintain a neutral spine position and avoid slouching.


Conclusion


Managing sciatica through effective exercise can be a game changer for seniors. By following a thoughtfully designed exercise regimen that prioritizes safety, flexibility, and strength, older adults can experience relief from symptoms and enjoy a better quality of life.


Whether it’s gentle stretches, low-impact walking, or strength training, implementing these strategies can empower seniors to take control of their health. As always, it’s crucial to consult with a healthcare provider before beginning any new exercise program, ensuring that the approach is tailored to individual needs and capabilities.


With commitment and the right strategies in place, seniors can effectively manage their sciatica and continue to live active, fulfilling lives.


bottom of page